Parts List: Everything You Need to Make Your Own Pendant Lights
Posted by Snake Head Vintage on Jun 15th 2019

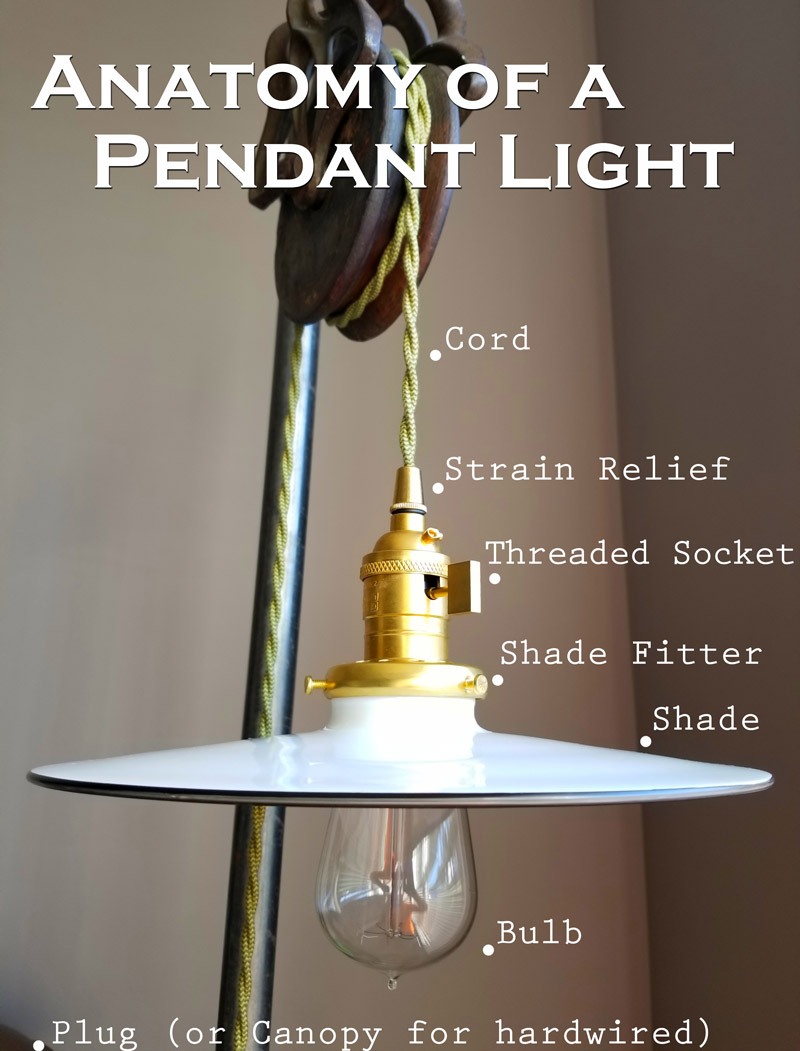
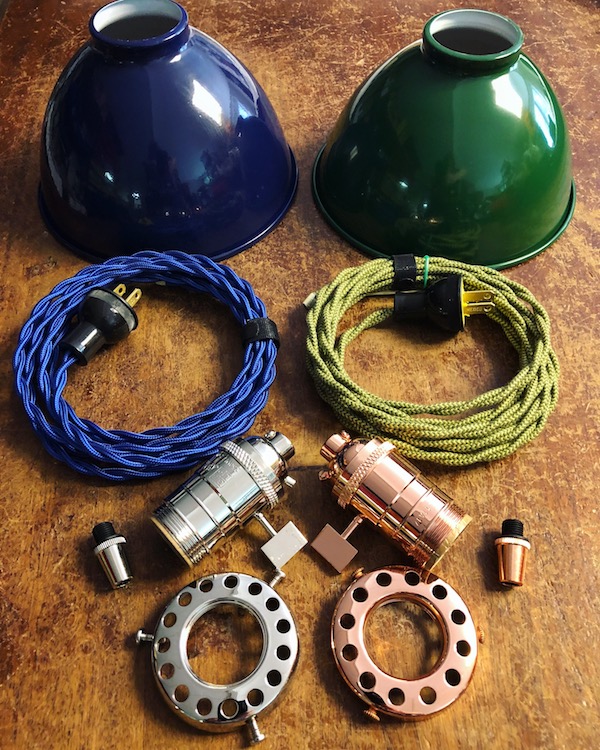
Designing and building your own pendant lighting can seem overwhelming, but break down the handful of parts that go into it and you'll realize it's a pretty straightforward process. Here we'll identify the parts needed to make a pendant light, what goes together and what doesn't, and provide a pick-list with links to make shopping for your parts easy!
1) Choose Your Shade
Your shade will determine the style of your pendant, and also the size fitter you'll need. We will be dealing with "necked" shades, those are the type that have a portion at the top of the shade that protrudes, allowing it to sit inside a shade fitter with thumb-screw tighteners. See Our Shades
2) Pick the Right Size Shade Fitter
You'll want the shade fitter to match the size neck your shade has, we sell 3 sizes: 2.25 inch, 3.25 inch, and 4 inch. 2.25" is the most common (our porcelain shades for example, and most small sized glass shades). In comparison, our 8" globe uses a 4" fitter. If you are retrofitting a vintage shade, or putting a new shade on a vintage fitter, the size fitter you need is determined by the max diameter of the shade neck. The fitter itself is usually larger than this dimension, because a 2.25" fitter means it is meant to fit a 2.25" shade neck, NOT that the fitter itself is sized at 2.25" (for example, the fitters outer diameter may measure 2.50"). The adjustment screws on the fitter allow for about 1/2 inch of adjustment, so for example: a 3.25" fitter will fit a shade with a max neck diameter of 3.25", but can go as low as 2.75" neck diameter. See Our Shade Fitters
3) Choose A Socket
You will need an UNO-threaded socket to work with UNO-threaded shade fitters, this is a classic style of threading found on sockets all the way back in vintage eras up to today. A regular socket (one with no threads) will NOT work with a threaded shade fitter. We sell UNO-threaded sockets in Turn-Knob or Keyless styles. If you are retrofitting old/new sockets and fitters together, know that uno-threading is by far the most common threading found on both new and old brass shell sockets and shade fitters, but there are other types out there and using a new socket or fitter on an old socket or fitter might not match up.
4) Add a Strain Relief
Also known as a cord gripper, these guys are a crucial little element in the equation. They thread into the socket base, and allow you to tighten up onto the cord after you have finished wiring the inside of the socket. Their purpose is to hold the weight/tension instead of having it transfer to the wire connections, risking damage or pulling out from the terminals inside. We have two styles depending on what type of cord you are using: Use the CONE SHAPED strain reliefs if you are using a 2-wire twisted or 2-wire parallel cord, use the SET-SCREW style strain reliefs if you are using a round cord.

5) Decide if it'll be a Plug-in or a Hardwired Fixture
There's two different ways to get this lit up: either you'll be plugging it into a wall outlet, or you'll be hardwiring it into a ceiling or wall junction box. If plug-in, (perhaps hanging from the ceiling and swagged over to where you want it, or built into a freestanding floor lamp like our demonstration picture), choose a 2-prong plug that you'll wire to the other end of your cord. Consider how you'll turn it on and off: either with a turn-knob on the socket, or an inline cord switch on the cord, or maybe you have a wall outlet that is controlled by a wall switch, or, simply plug it in and out as needed if it's not a frequent use light. For a hardwired fixture, you'll choose a canopy and hardware kit instead of a plug, and you'll be using that to connect to your buildings electrical wiring inside a junction box, which the canopy will cover when complete. Whether plug-in or hardwired, be sure during the next step (picking your wire) you measure our enough to get you from point A to point B, plus a little extra to play it safe.
6) Choose a cord
This can be the hard part, only because we offer so many different styles, patterns and colors! The good news is any of our standard cords will work for this kind of setup. Generally for basic pendants a ground connection is not used in the socket, so a 2-wire cord is all that is necessary (and if you like the look of the round cord which only comes in 3-wire, you are welcome to snip off the ground and leave it unused). If you do require the socket to have a ground connection, you can choose a 3-wire cord and you'll have to use the uno-threaded turn-knob sockets, because those are the only ones that offer the optional grounding tab. As far as which color or style to choose, the sky is the limit! Some choose to match the shade color, or the socket color, or neither! Add a pop of color, or tie it in with something else in your spaces decor, or go with something utilitarian if you want more attention drawn to the shade and bulb area. Have fun! See Our Cloth Cord Selection
7) Don't Forget the Light Bulb
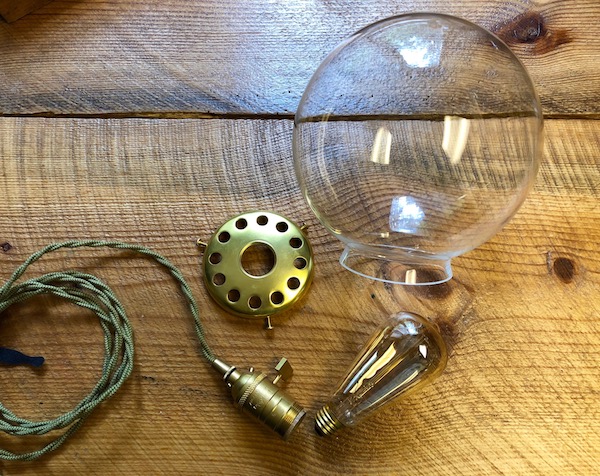
Ahh the finishing touch, the most important part and also the easiest: it just screws in! While with most shades you can choose almost any light bulb size or shape, if it's a small or enclosed shade (like our small glass bell shades, or our 8" enclosed globes), you'll want to make sure you don't pick something too big to fit. We've got some great options for
Edison filament bulbs, definitely recommended for these type of exposed bulbs pendants for offering an eye-pleasing warmth and tone, and a look that is worthy of being shown off.
Parts Shopping List: |
|
Let's Get Creative!
|
|


